
How to Make Film Curves in Photo Editing
Film curves are a highly effective and versatile editing tool that can significantly enhance the visual appeal of your digital photos. Essentially, these curves allow you to adjust the tonal values of your images, thereby emulating the unique look and feel of traditional film photography. By manipulating the curve, you can control the contrast, brightness, and saturation of your photos to create a soft, dreamy, or muted visual effect.
This can help bring your images to life, imbuing them with a timeless, classic look that is both visually striking and evocative. Whether you’re a professional photographer or a hobbyist, mastering the art of film curves can help take your photography to the next level. Whether you want to go for a timeless Kodak Portra look or a moody Ilford black and white film effect, learning to use film curves can take your photo editing to the next level.
What Are Film Curves?
A film curve refers to the unique way that different films represent brightness and color. When light hits camera film, the chemicals respond in a nonlinear way to create the exposure. This causes the tone curve to be compressed in the shadows and highlights compared to a digital sensor.
Physical film also cannot perfectly reproduce all colors. Different films have their own color profiles that give images a certain aesthetic. For example, Kodak Portra is known for its soft pastel look while Fuji Provia is more vibrant.
By adjusting digital photos using film-inspired curves, you can recreate the classic filmic look. This lets you get versatile effects without having to shoot on actual film.
Why Use Film Curves?
There are a few key benefits to using film curves:
- Vintage aesthetic – Film curves add a timeless, organic look that is hard to replicate with other editing tools. The curves compress the shadows and highlights in a pleasing way.
- Softens contrast – Film has lower overall contrast than digital sensors. The curves gracefully roll off the extremes rather than clipping harshly. This creates a more flattering portrait look.
- Mutes colors – Physical film cannot reproduce colors as vividly as digital cameras. Adjusting RGB channels with film curves tones down intense colors in a natural way.
- Unique styles – Each film stock has its own distinct curve shape and color profile. By choosing different presets, you can make your photos emulate different films like Kodak, Fuji, Ilford, and more.
- Avoids HDR look – Heavy-handed HDR tone mapping can look artificial. Film curves provide dynamic range compression in a more organic way.
- Easier than film – Getting true film looks requires shooting on film or editing in complex RAW converters. Film curve presets let you get film-inspired results with just a few clicks.
So if you want to give your digital photos a cooler, retro look, film curves are a must-have editing tool. The curves can tack on a layer of analog warmth in a way that other adjustments just cannot match.
How Film Curves Work
To understand film curves, let’s quickly cover how they differ from a normal digital curve.
The tone curve of a digital sensor is linear – this means shadows get darkened proportionally the same as highlights get brightened. But the chemicals in film respond in a nonlinear way.
Film has a characteristic “S-curve” with compressed highlights and shadows:
- A normal digital curve vs. characteristic S-curve of film.
This shape rolls off the extremes for lower overall contrast. It also introduces some color nonlinearities that shift hues and saturation.
By manually shaping your photo’s curve or using film-inspired presets, you can mimic this analog response. Here are some key ways the curve affects your images:
- Brings down highlights and raises shadows
- Compresses dynamic range
- Adds grain and texture
- Warms colors slightly
- Boosts saturation subtly in midtones
- Softens extreme colors
- Darkens blue channels
Understanding these curve effects will help guide your editing process. Next let’s look at how to actually make film curves in Photoshop.
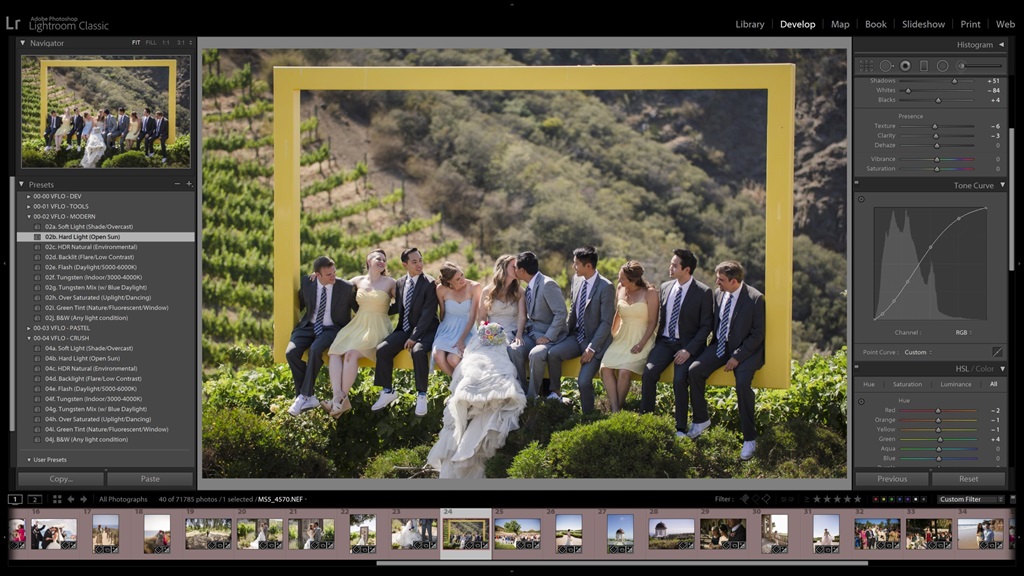
Using Film Curves in Photoshop
Photoshop has powerful curve adjustment tools to help recreate film looks. Here is an overview of the process:
1. Add a Curves Adjustment Layer
Open your image in Photoshop. To safely edit curves non-destructively, we’ll use an adjustment layer:
- Go to Layer > New Adjustment Layer > Curves
- This will create a new curves layer that you can tweak and disable later
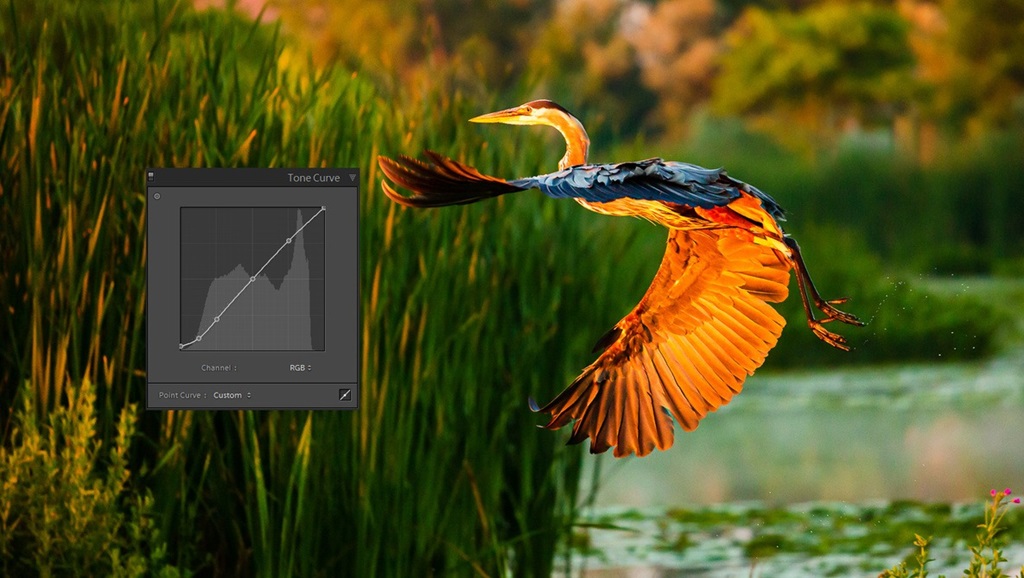
2. Adjust the RGB Curve
Go to the Curves Properties panel. You’ll see a diagonal line against a grid:
- The horizontal axis shows the input tones from shadows (0) to highlights (255)
- The vertical axis displays the output tones
- By shaping the curve, you alter how input values get mapped to output values
Add control points on the curve and drag them up or down to shape it:
- Pull down the upper-right to compress highlights
- Pull up the lower-left to lift shadows
- Add slight S-shape for medium contrast compression
Don’t go overboard or you can lose important detail. Just introduce a subtle S-shape at first.
3. Target Color Channels
Besides the overall RGB curve, you can also edit the individual R, G, and B channels. Go to the Channel drop-down menu in the Curves panel.
Some adjustments to try for different film looks:
- Drop the blue channel slightly to warm up skin tones and highlights
- Bring down the green channel a bit to mute intense greens
- Boost red channel in the midtones for richer color saturation
Tweak channels subtly to control color balance and saturation. Don’t make huge shifts.
4. Add Film Grain
Lastly, go to Filter > Noise > Add Noise to introduce some fine grain that mimics high ISO film:
- Use 10-15% Gaussian noise
- Set it to Monochromatic to avoid color noise
- This grains mimics the texture of real emulsion
Add just enough grain to get a filmic quality without overpowering details.
And that covers the basics of using Photoshop’s tools to introduce film-inspired curves! With practice, you’ll get better at sculpting the precise curve shapes to match different film stocks.
Next let’s go over some specific film curve presets you can try…
Film Curve Presets in Photoshop
Manually editing the curve from scratch each time can be tedious. Luckily, there are many free film curve presets for Photoshop. These instantly apply complex curve shapes and color adjustments.
Here are some great places to get film curve presets:
Ritchie Roesch Presets
Ritchie has lovingly crafted presets that emulate both color and black/white film stocks from Kodak, Fuji, and Ilford. They run the gamut from bright, rich films to moody high-contrast ones.
Nate Photographic Presets
Nate offers film presets inspired by iconic stocks like Kodak Portra, Ektar, Gold, and Tri-X. Great for getting a vintage film look in one click.
FilmConvert Profiles
FilmConvert specializes in film emulation tools. Their Photoshop Profiles have well-tuned curves based on analog film stocks and you can get the free Starter Pack to try them.
RC Concepcion Presets
RC’s Cool Tones and Warm Tones packs have film-inspired color and curve adjustments to give your photos an authentic filmic style.
Simply download the packs, install them into Photoshop, and apply them to add credible film effects fast. They work well when layered on top of manual curve tweaks too.
Tips for Realistic Film Looks
When using film curves, it helps to keep these tips in mind for the most natural, believable results:
- Don’t crush blacks or blow highlights – Keep in mind film’s reduced dynamic range. But avoid clipping highlights or crushing blacks too much or you’ll lose detail. Find a graceful balance.
- Make subtle color shifts – Don’t wildly oversaturate or wildly desaturate colors. Keep color adjustments natural and mild.
- Match editing to film type – High contrast black & white films will need a sharper curve. Lower contrast color films need a more rounded curve shape.
- Use appropriate grain – Monochromatic grain works well for black & white. Color film grain is better for color images. Match grain structure to ISO.
- Blend with lower opacity – Don’t apply film presets full-strength or they can look too heavy. Try reducing opacity to blend the effect gently.
- Finish with vignette & borders – Adding slight vignettes and film borders can really sell the analog look, but use them judiciously.
- Edit RAW files – Most film presets are designed for editing RAW/unprocessed photos with high dynamic range. JPEGs tend to look overcooked.
With practice and subtler application of film curves, you can convincingly simulate all kinds of vintage film stocks in your digital editing workflow.
Conclusion
Adding film curves during editing is a powerful way to make digital photos take on a classic, analog look. By emulating the softer contrast and characteristic tone compression of real camera film, the curves lend a timeless quality. Presets make it easy to apply custom curves inspired by iconic films from Kodak, Fuji, Ilford and more.
With a subtle hand, film curves can convincingly simulate the analog “feel” in a natural way. They offer new creative options without having to switch to shooting film itself. While taking some practice, film curves provide one of the best ways to give sterile digital shots more atmosphere and emotion.
So try out some of the curve techniques and presets covered here! With skillful use of film curves, you can take your edited photos from flat and digital to rich and full of vintage character.
FAQs
Here are answers to some frequently asked questions about using film curves:
Should I edit color or black & white photos?
Film curves work great for both color and B&W photos. For color, they give a softened pastel look. For black & white, they lend dramatic contrast. Most presets come in both color and B&W versions to use accordingly.
What’s the best order for editing layers?
It’s usually best to apply the curves before major color changes so the curve can influence the hues and tones. After curves, you can make local saturation, color grading, split toning adjustments.
How do I choose the right film curve?
Pick film curves that match the tone of your photo. Low contrast, bright scenes pair well with Portra-style curves. Dramatic high-contrast photos suit bold black & white film presets. Find the closest visual match.
Should I edit JPEGs or RAW files?
RAW files respond best to film presets since they have more flexibility and dynamic range. But you can still use them on high quality JPEGs and TIFFs too. Just watch clipping in the highlights/shadows. Lower the opacity if needed.
Can I stack multiple film effects?
Absolutely! Blending 2-3 film curve layers at reduced opacity creates complex, rich looks. Just make sure to adjust opacity so details don’t get muddy. Make sure color shifts don’t get too intense.


