
The Warm Allure of Sepia Photography
The sepia photo tone is an iconic effect that has a unique ability to evoke nostalgia and transport us back to past eras. This warm brownish hue, with its subtle tonal range, is a popular choice for photographers and enthusiasts who want to create vintage-looking images. While color photography has dominated the industry for decades, sepia-toned images have an enduring appeal that has stood the test of time.
Creating sepia-toned images is still popular today, even with the advent of digital photography. In fact, many modern photographers use digital editing software to create sepia effects on their digital images. The process involves adjusting the color balance and saturation of the image to create a warm, brownish hue that mimics the look of traditional sepia prints. Overall, sepia-toned images are a timeless and classic choice for anyone who wants to add a touch of nostalgia to their photography.
A Brief History of Sepia Photo Toning
Long before color film, early photographers made use of sepia toning. In the late 19th century, sepia-toned photographs gained popularity for their antique appearance. Photographers would treat prints with sepia toner to give them an aged look. The effect was similar to monochromatic photos of the era fading over time.
The creation of the sepia tone is a chemical process. Silver gelatin prints consist of tiny particles of metallic silver suspended in gelatin. The metallic silver gives black and white photographs their gray tones. When a photographer treats a print with a sepia toner, the metallic silver particles are converted to silver sulfide. This chemically alters the print, giving it a reddish-brown sepia color.
Though color photography overtook sepia toning in popularity through the 20th century, the nostalgic effect remains desirable today. Digital processing allows modern photographers to easily add a sepia tone to photos. The vintage style is applied widely, from casual snapshots to wedding photos.
Achieving the Sepia Look in Camera
Today’s digital cameras make it easy to capture photos with a sepia style straight out of the camera. Here are some methods:
Use Sepia Photo Settings
Many digital cameras have predefined sepia modes. Activating this setting applies a sepia tone to your photos as you shoot. Look for a setting labeled “sepia,” or sometimes “antique” or “mono.” This instantly gives your photos an old-timey look.
Apply Sepia Filters
Some cameras allow you to apply filters like a sepia tone when shooting. You’ll find these options in your camera’s menu settings. Turning on a sepia filter is a quick way to capture images with a nostalgic style.
Select Monochrome Modes
Set your camera to monochrome or black-and-white mode. This removes color from your photos. You can later process the monochrome images to create a sepia tone. Shooting in monochrome mode helps preview the mood of sepia-toned photos.
Adjust Color Channel Intensities
Choose manual settings on your digital camera to decrease blue channel intensity and increase red channel intensity. This produces an in-camera photo filtered toward sepia hues. You may need to adjust other color channels to perfect the look.
Applying Sepia Effects in Post-Processing
The most flexible approach for achieving sepia-toned images is through post-processing. Photo editing software provides precise control over the look. Here are some techniques:
Use Sepia Presets
Many photo editing apps include preset sepia effects. With one click, these instantly add a lush sepia tone to images. Adobe Lightroom, Photoshop, and Snapseed are among the apps with great sepia presets. This method makes quick work of processing large batches of photos.
Desaturate Into Monochrome
You can manually remove color from a photo to turn it monochrome. In apps like Photoshop and GIMP, adjust the Saturation slider to -100 to completely desaturate a photo. This creates a black-and-white image ready for sepia toning.
Add a Sepia Tone
After desaturating to monochrome, add a sepia tone. In Photoshop, go to the Color Balance adjustment and increase the Reds and Yellows sliders while reducing the Blues. The Midtones sliders have the strongest effect. Keep tweaking the sliders until you achieve a rich sepia look.
Boost Contrast
After applying the sepia tone, consider boosting contrast slightly to intensify the vintage style. Subtle contrast enhancement brings out the texture and definition of a sepia image. But don’t overdo it.
Add Grain
Introduce a slight grain effect to give sepia photos an antiqued, weathered appearance. A touch of grain increases the nostalgic quality. Make sure the grain looks natural by keeping it subtle.
With practice and subtle adjustments, you can master the art of creating authentically antiqued sepia-toned images. The style remains a classic way to romantically convey past eras.
Ideal Subjects for Sepia Photography
Certain scenery and subjects lend themselves particularly well to sepia tones. When planning a sepia-style shoot, keep these subject ideas in mind:
- Old barns, farms, and rural buildings
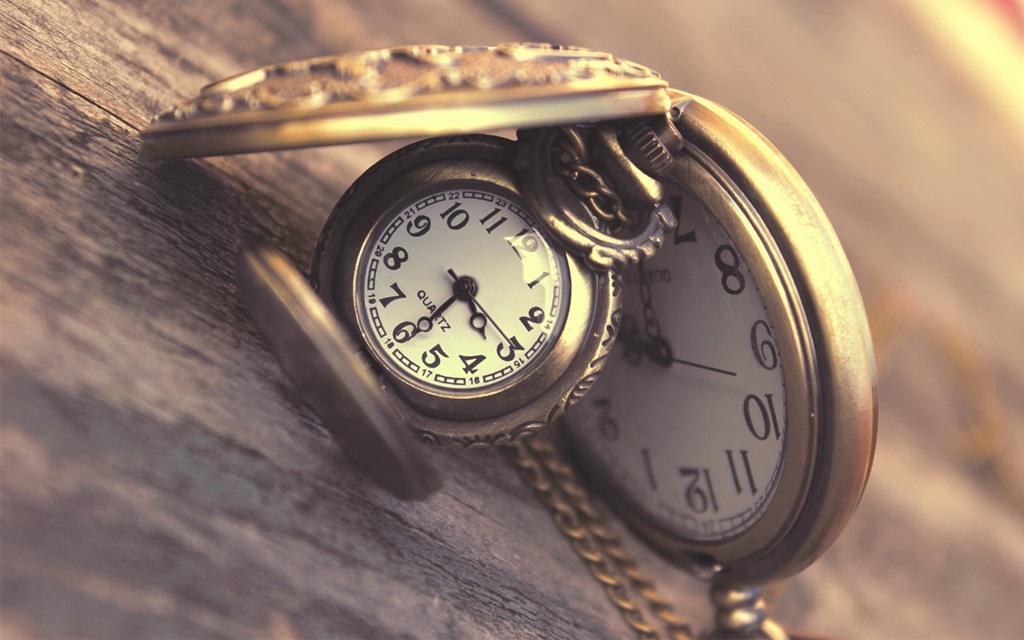
- Antique objects like watches, vehicles, or equipment
- People wearing vintage or historical costumes
- Portraits of the elderly
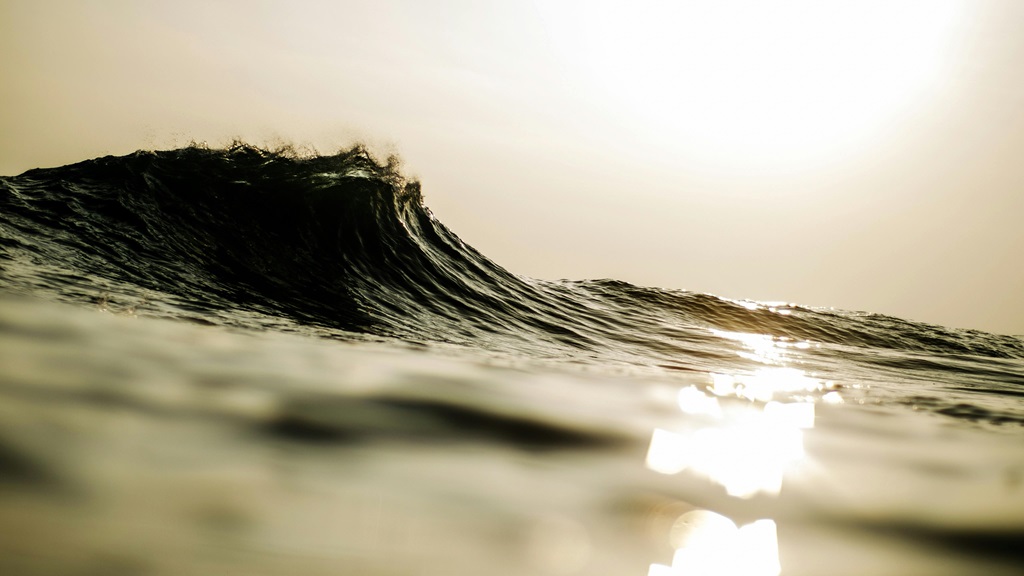
- Beach or seaside landscapes
- Desolate trees in winter landscapes
- Abandoned places and ruins
- Historic cityscapes or cobblestone streets
Avoid modern elements like cell phones, power lines, and contemporary buildings. Seek out aged subjects that feel naturally complemented by sepia’s old-fashioned charm.
When shooting subjects like portraits in sepia, use soft, diffuse lighting. This enhances the dreamy, timeless mood. Side or backlighting works well to rim a subject in glowing highlights.
Tips for Capturing Better Sepia Photos
Approaching your shoot with sepia in mind helps capture shots well-suited to the style. Here are some tips:
- Compose symmetrically. Sepia has an old-world look consistent with formal, balanced framing.
- Use leading lines. Lines and repeated shapes draw the eye into an image.
- Feature interesting textures. Weathered surfaces come alive in sepia. Seek gritty, rustic textures.
- Use minimal depth of field. Soft, blurry backgrounds evoke a sense of nostalgia. Open up your aperture for a narrower depth of field.
- Shoot in haze or fog. These conditions give sepia landscapes a romantic, ethereal atmosphere.
- Focus closely on subjects. Detailed portraits and intimate still-life images gain rich flavor.
With practice, you’ll develop an intuition for finding and capturing shots that lend themselves perfectly to sepia processing.
5 Tips for Processing Better Sepia-Toned Photos
- Don’t oversaturate the tone. Keep it subtle for a realistic, antiqued look.
- Boost contrast mildly to add definition. But avoid strong contrast that looks unnatural.
- Warm up the tone. Add a touch of yellow/orange rather than straight brown.
- Use a slight vignette to draw the eye inward. Keep it subtle.
- Add film grain sparingly. Just a whisper of grain maintains realism.
Conclusion
With its nostalgic antique flair, sepia toning remains one of the classic and appealing styles of photography. Though color dominates today, there’s an enduring warmth and beauty to sepia’s romantic brownish tones. Mastering sepia requires learning how to capture wistful, textured scenes that lend themselves to the vintage look. With practice in camera and software techniques, photographers can readily create sepia photos that seem deliciously transported through time. Sepia photography maintains its delightful transportive magic.
Frequently Asked Questions
What is sepia toning?
Sepia toning is a process of treating black and white photographic prints with a toner that converts the metallic silver in the print to silver sulfide. This gives the image a reddish-brown sepia color to make it look antiquated.
Why do people use sepia tones?
The sepia tone gives photos an old-fashioned, nostalgic look reminiscent of 19th-century photography. It’s popular for evoking vintage charm.
How do you create a sepia tone?
In the darkroom, silver gelatin prints are treated with a sepia toner bath. Digitally, you can use sepia presets, desaturate to monochrome, and add brown/red tones.
What colors make sepia?
Sepia is made by adding yellow, orange, and red tones while removing blue tones. The interplay of these colors produces sepia’s classic antique brown look.
What subjects look good in sepia?
Sepia is well-suited to aged subjects like barns, antiques, people in vintage clothing, winter landscapes, abandoned buildings, and old cityscapes.


