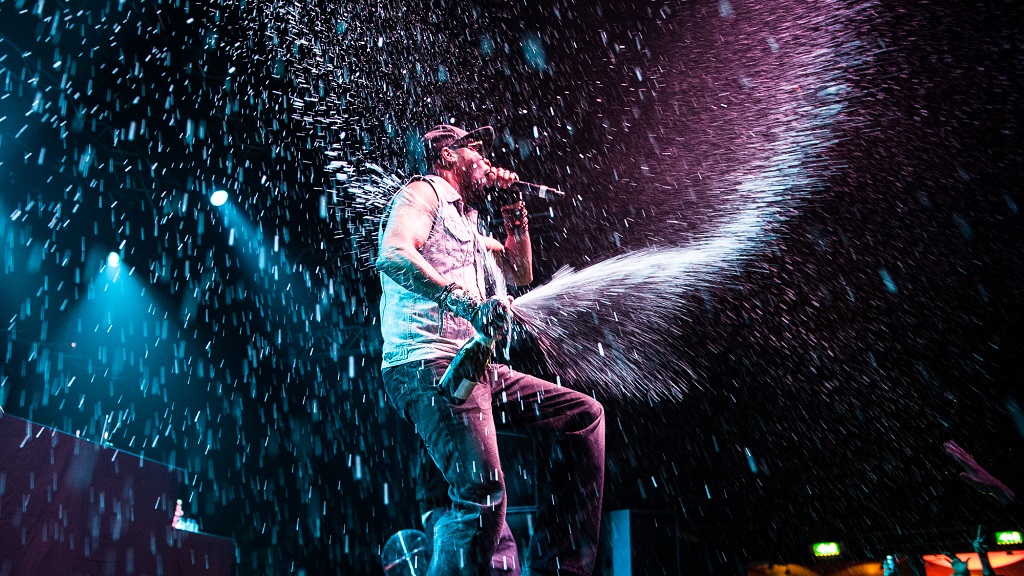
Concert Photography – Tips and Tricks for Taking Good Pictures
Taking concert photographs is not as simple as any other portrait, but it is not that difficult. Has it happened to you to go to a concert with your camera and come back totally frustrated, without any photos worth sharing? With these tips, I assure you can do concert photography professionally.
What Are We Going To Find During Concert Photography?
Unlike any other portrait, in concert photography you will find some difficulties:
Not Being Able To Communicate With the Portrayed
In any photo session, we can ask the other person how to pose, what gesture to do. We cannot make this type of request to the musicians in a concert, so we must pay close attention to their movements and expressions until we achieve what we are looking for.
The musicians’ movements on stage are unpredictable. In a second of distraction, we can lose a special expression, so we must be attentive to the show’s climate.
Do Not Operate the Lights
Another problem we must face is that the lighting of the show is not something we can handle. Perhaps you can talk in advance with the lighting manager to find out how he plans to set the concert, but the reality is that we don’t know how the musicians, their instruments, and the background will be lit until the show starts up. Etc.
We Cannot Control The Public
This will only mean a problem if we are photographing among the audience, but in this case, we must not only be attentive to what is happening on the scene, but we must also take care of our equipment from possible bumps or falls.
The Necessary Equipment in Concert Photography
There is a certain belief that a camera with some special features is necessary to photograph concerts and that, therefore, not just anyone can do it. False. There is no better camera than another for these jobs. If you don’t get good first-rate photos, you will work with a little more practice. As for the lens, you can work perfectly with the ones that come with a camera kit, usually 18-200mm or 18-55mm.
Where To Stand To Get Good Photos At A Concert
A very important issue is the place where we are going to take photos. Everything will depend on the type of show, if it is a large festival or an intimate concert, if you have a section for photographers or not, etc. If you are going to cover a concert, there may be a place away from the public so that the photographers can work in peace.
The photos from this place are usually great because of the musicians’ proximity and the freedom to compose. In that case, don’t forget to bring your press pass with you! Once you have obtained several shots, you can leave that place (if they authorize it) and look for images from other points of view. One place that I highly recommend is from where the sound console is.
The sound technician is usually in a distant location from the stage but with good general visibility. Before the show, you can ask him if he allows you to take some photos from that place to get a good panoramic image. Do not forget that if it is a place with a stage, you can try to photograph one of the sides. This will give a different perspective with the artist’s profile and the public’s inclusion, surely giving a spectacular image.
Set Up the Camera to Photograph A Concert
Camera settings depend on many factors, but here are some general tips to help you:
1 – Raw
First of all, check that you are shooting in RAW format. You need the best possible quality to compensate for the low light with which you will work.
2 – No Flash
Disable the flash, do not use it under any circumstances. Not only is it annoying for the artist, being able to blind or deconcentrate him during his presentation. They also give us a very harsh photography style, which possibly cuts the show’s atmosphere or has nothing to do with what was happening on stage. For that, we have the lighting of the place. Use that tool to your advantage.
3 – Manual Mode
The menu configuration works in Manual mode (M), looking for the shutter speed and diaphragm aperture that best suits the show’s time. During a quiet moment, you can try slower speeds and close the diaphragm a little to expand our depth of field and focus elements. If, on the contrary, you will be forced to use faster speeds during a more dynamic moment, compensated with large openings.
4 – Depth Of Field
Remember that using a very wide diaphragm means reducing the field’s depth, so you have to be very careful to achieve an accurate focus. In these shots, the recommended thing is to take the photo, enlarge the image, check the focus, and, if it failed, repeat the shot.
5 – ISO
It is always advisable to use the minimum possible to avoid adding noise to the image regarding the ISO. Still, new equipment supports high ISO levels without losing image quality, so we can increase it without inconvenience.
6 – Lighting
Do not shoot one photo after another without stopping if you see that the musician’s stage is not well lit. If the artist’s pose is not the most favorable, be patient, and wait for it to receive the necessary light and pray that it coincides with a good musical moment where it “explodes.” Those moments will result in a more impressive photo.
A good way to take advantage of stage lighting is with background lights. The front lights are often lowered, and the rear lights are left, giving us great shots in silhouette.
Good manners are always essential, that’s nothing new, but I still wanted to dedicate these lines to that topic since sometimes we photographers do a lot of stage work, not missing any images and forgetting the rest of the world.
